Setup and User Guide for Samsung Galaxy Note9

It’s an exciting time – you’ve got a new Samsung Galaxy Note9. You're now ready to get it up and running so you can enjoy it in all its glory.
What we cover: (Click to jump to the relevant section)
• What’s in the box?
• Inserting the SIM and memory cards
• Completing the Setup wizard
• Connecting to Wi-Fi
• Adding an email account
• Sending emails
• Sending text messages
• Sending WhatsApp messages
• Downloading apps
• Using Samsung pay
• Using the S Pen
• Multitasking
• Backing up content
• Using Smart View
What’s in the box?
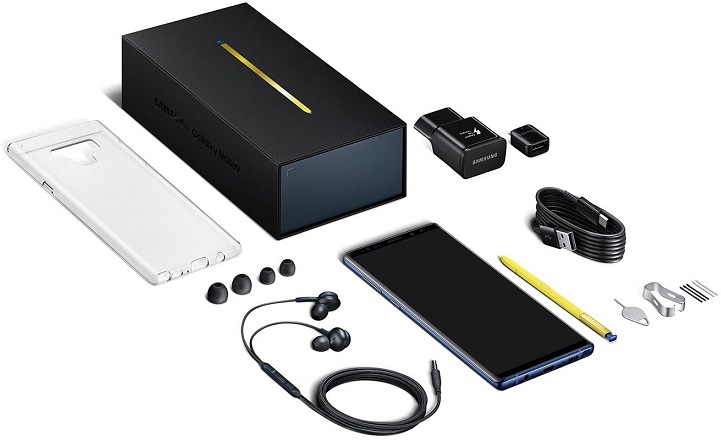
• Galaxy Note9 (with S Pen)
• Mains power adaptor
• USB-C cable
• Micro & Standard USB adaptors
• Wired earphones
• Spare nib/tool for S Pen
• SIM tool
• Information pack
Inserting the SIM and memory cards
The Note9 takes a nano-SIM. If you didn’t get one with your new phone, your network provider can send you one. You can also add some more storage space with a ‘microSD’ (memory) card.
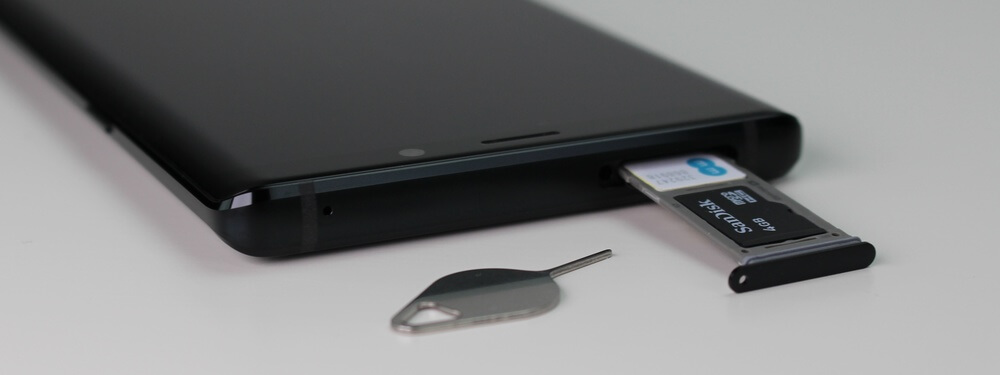
- The SIM and memory cards go into a tray in the top edge of the Note9. Push the pin end of the SIM tool into the tray’s pinhole to release it, then pull it out with your fingers.
- Put the nano-SIM in the holder at the inner end of the tray, with the contacts facing down and lined up so the cut-off corner goes into the phone first.
- If you’re adding a memory card, put it in the outer holder, contacts down and the narrow end next to the SIM card.
- Slide the SIM tray back into the phone until it stops.
Completing the Galaxy Note 9 Setup Wizard
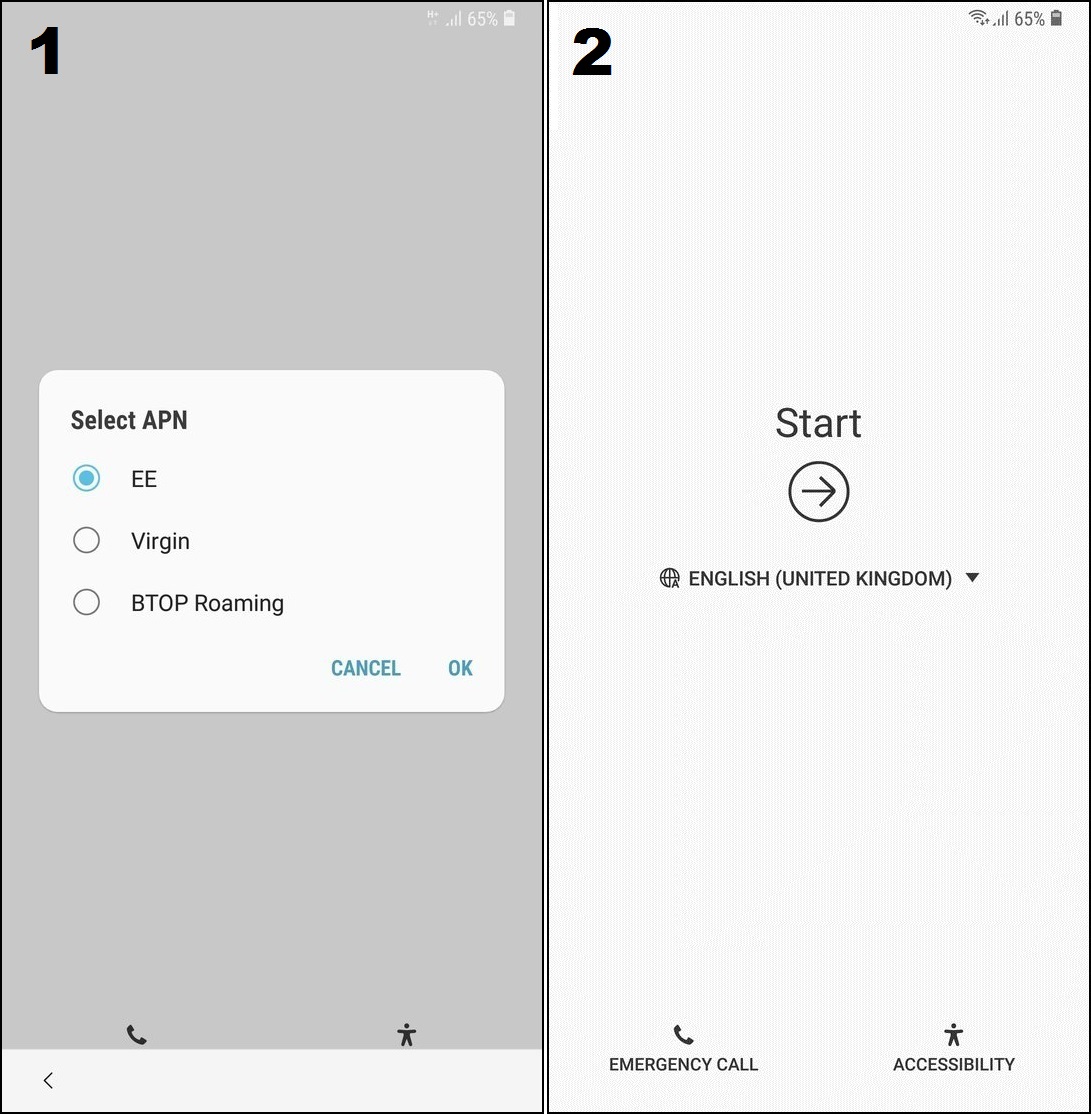
Now you’ve put the SIM in, it’s time to get to the exciting part of getting it set up. Press the Power button on the right edge of the phone for a few seconds until the phone vibrates. When the screen comes on you’ll see the first screen of the Setup Wizard. These steps explain what you’ll see as you go
- Choose your network name from the list, then tap OK.
- Change the language to use if you want to (English is pre-set) then tap the Arrow to start.
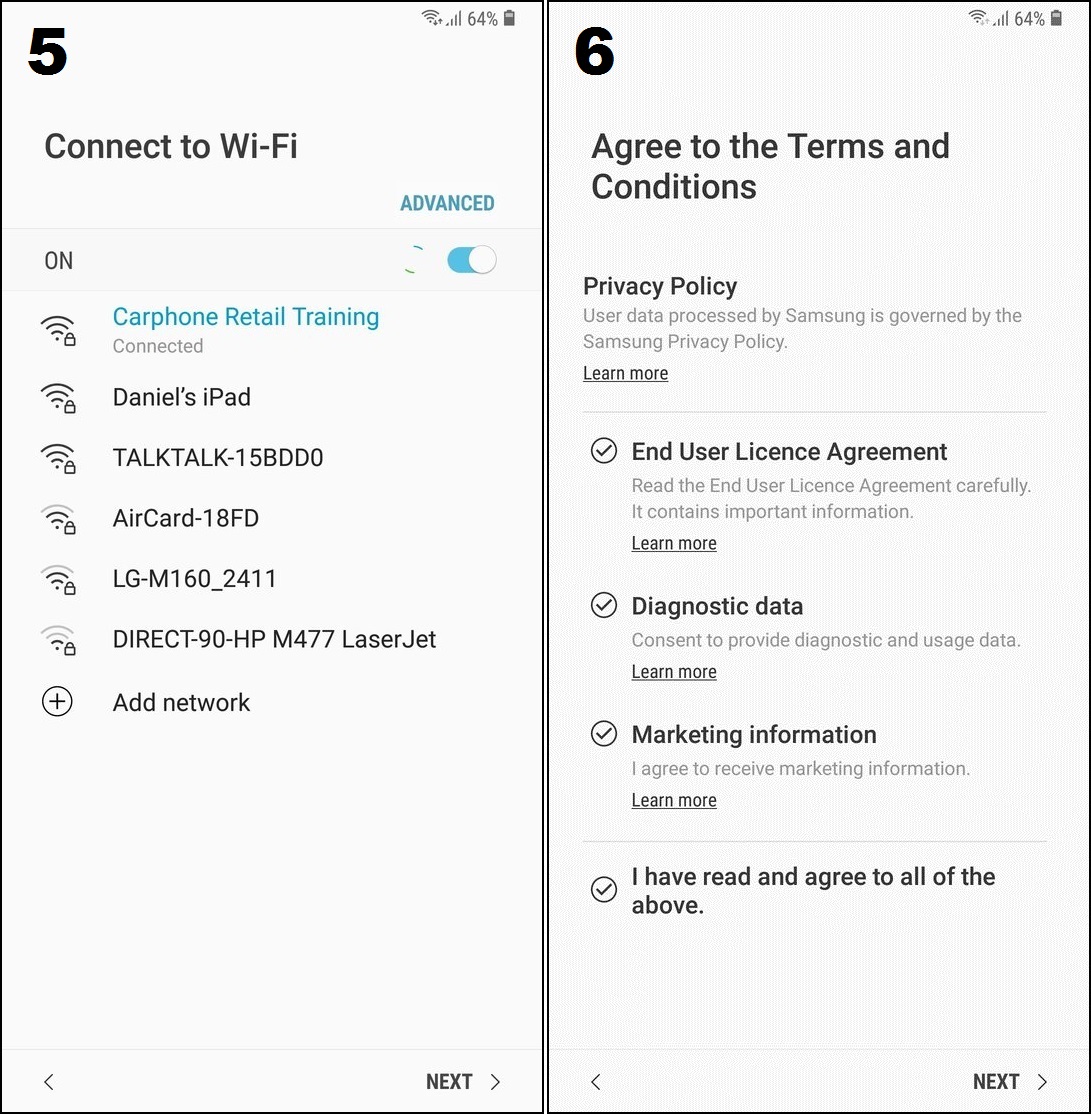
- Connect to Wi-Fi to download everything you need while you’re setting it up. Tap your wireless network name.
- Type the wireless password and tap Connect. If you’re not sure what it is, check the sticker on your router.
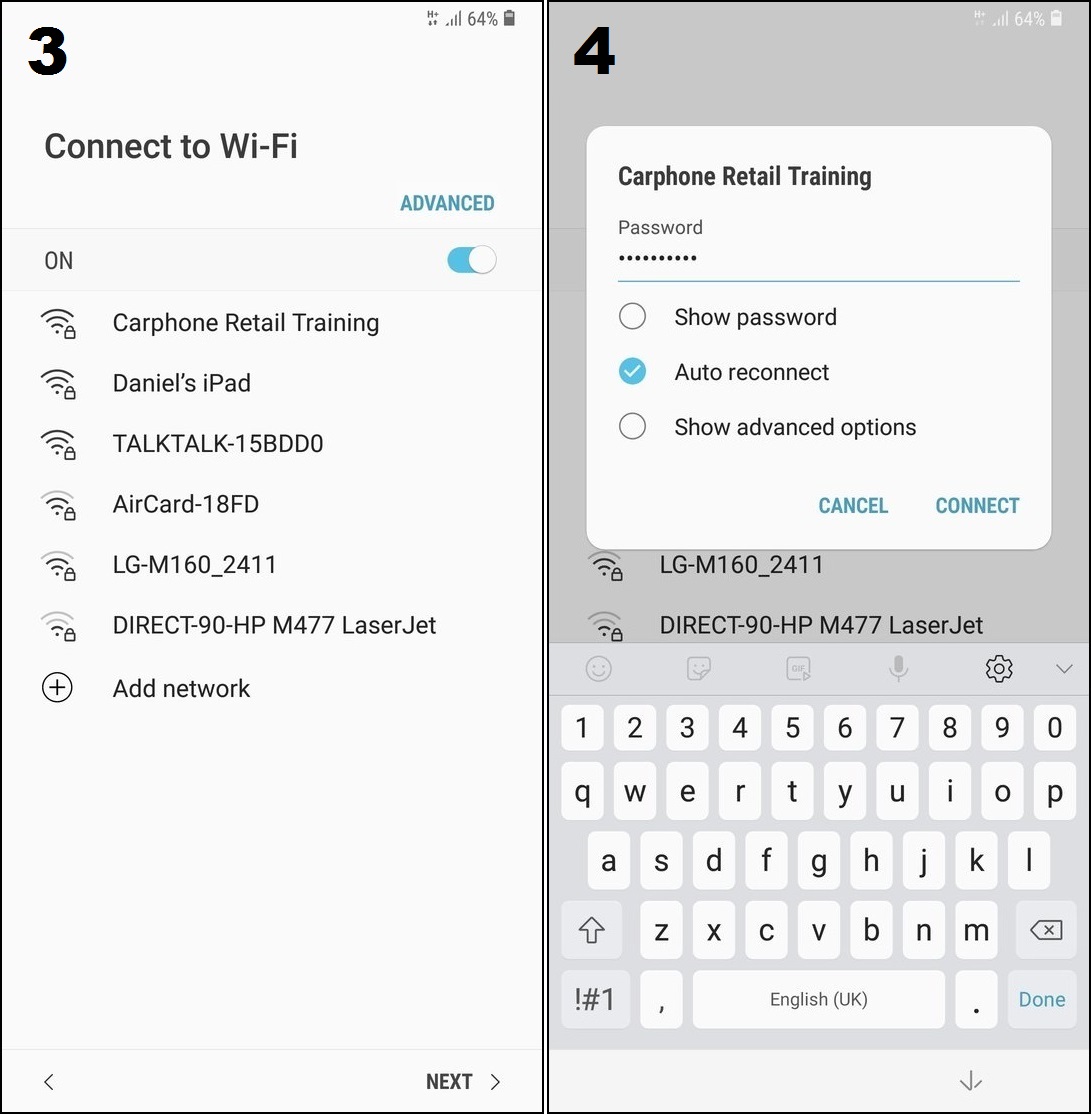
- When you’re connected the network name will turn blue. Tap Next.
- You have to agree to Samsung’s ‘Terms & Conditions’ to use the Note 9. Tap Learn more to see more details, tick the circles to accept them and tap Next.
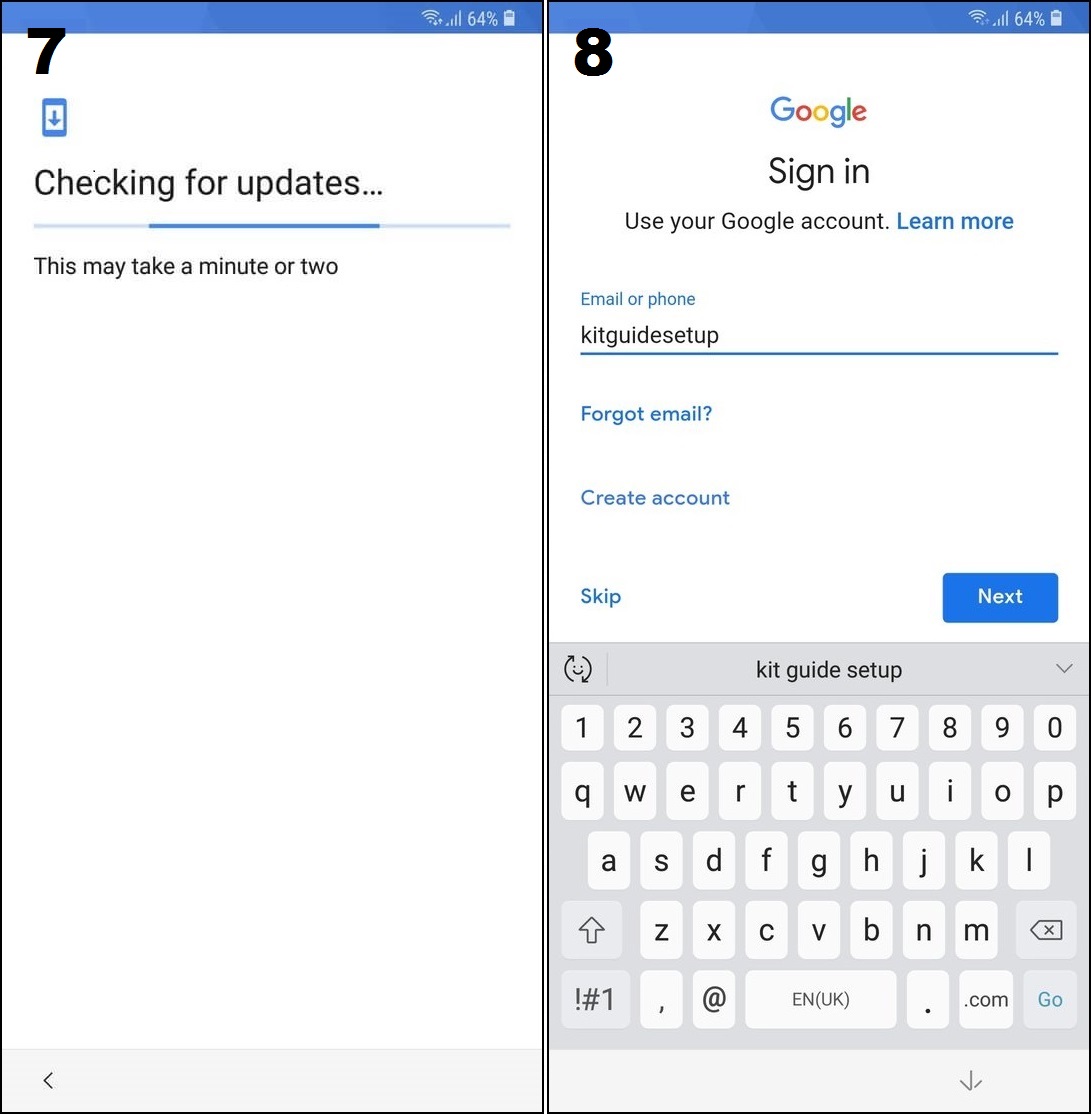
- The Note 9 will check for updates and download them in the background if there are any.
- Add your Google account to download apps, back up your phone and more. Type your email address and tap Next, or tap Create account to make a new one for free.
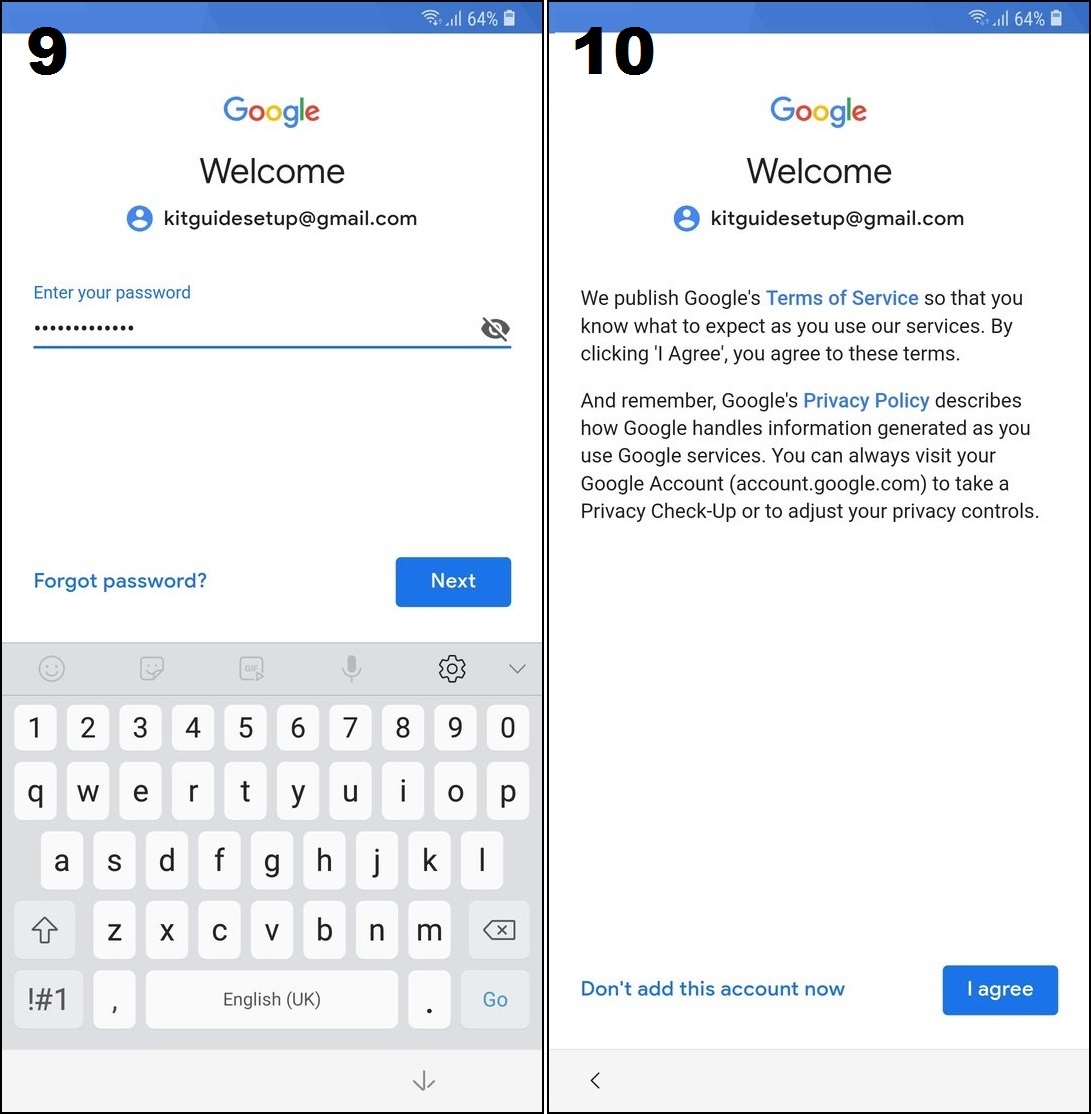
- Type your password and tap Next, or complete the form to make a new one.
- Check Google’s legal stuff and tap I Agree to add your account.
- You might see backups if you’ve had an Android phone before. Tap one to restore it to your new Note 9 or tap Don’t restore to set it up as a new phone.
- A lock screen helps keep your stuff private, but unlocking it every few minutes while you’re setting your phone up can get annoying. Tap an unlock method to set it up now, but we cover it in full later on so choose No, thank you and tap Skip to leave it.
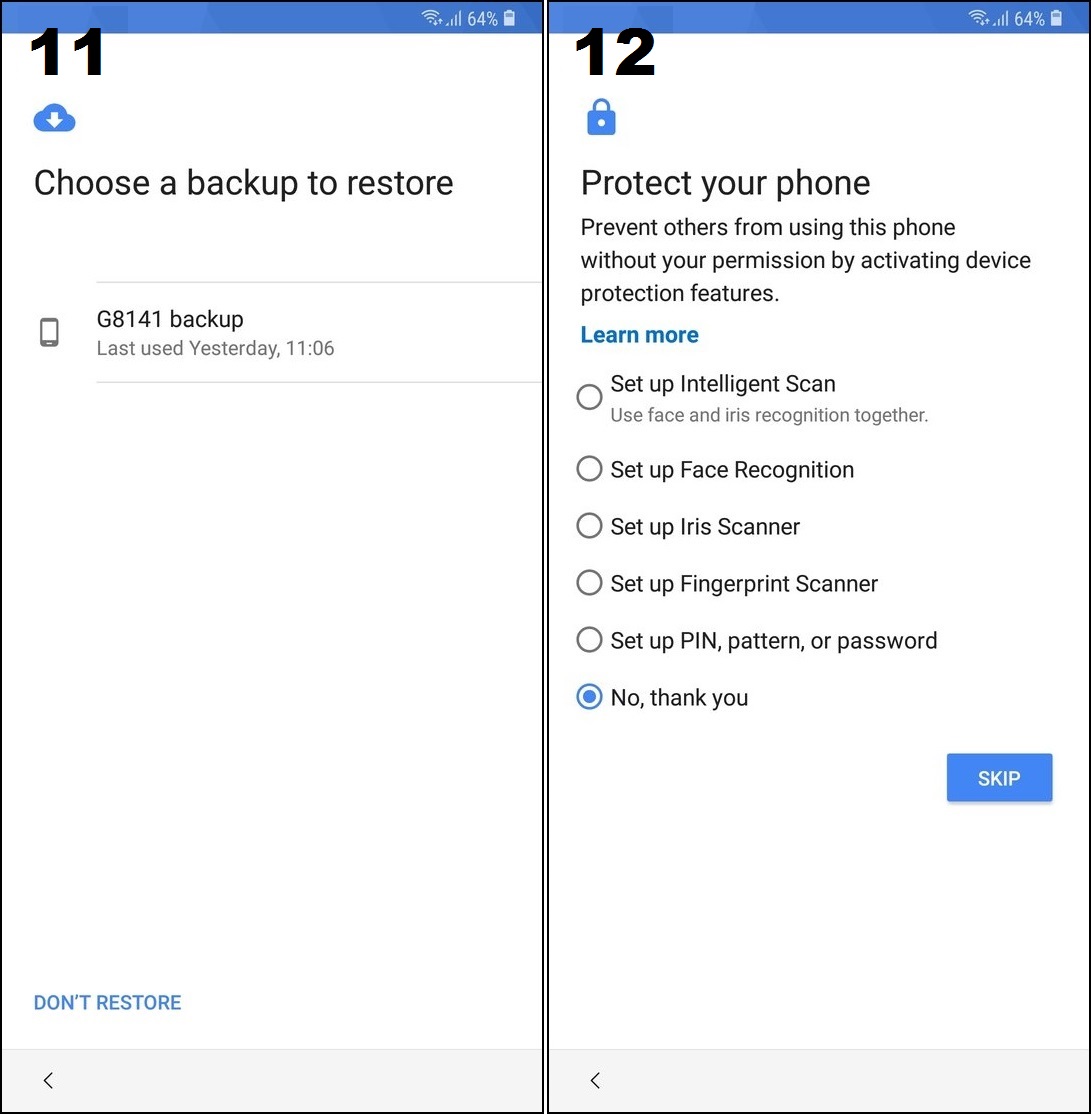
- If you’re doing it later, tap Skip anyway to move on.
- The Google Assistant can answer questions, search the web and do things for you. Skip if you don’t want to use it, or tap Next to set it up.

- If you’re setting it up, you might be asked to enable some settings. Tap Turn on, or No thanks to skip.
- Google services help your phone work at its best. Leave the first switch on to back your phone up (you’ll be glad you did if you have to replace it). Tap More to see them all.
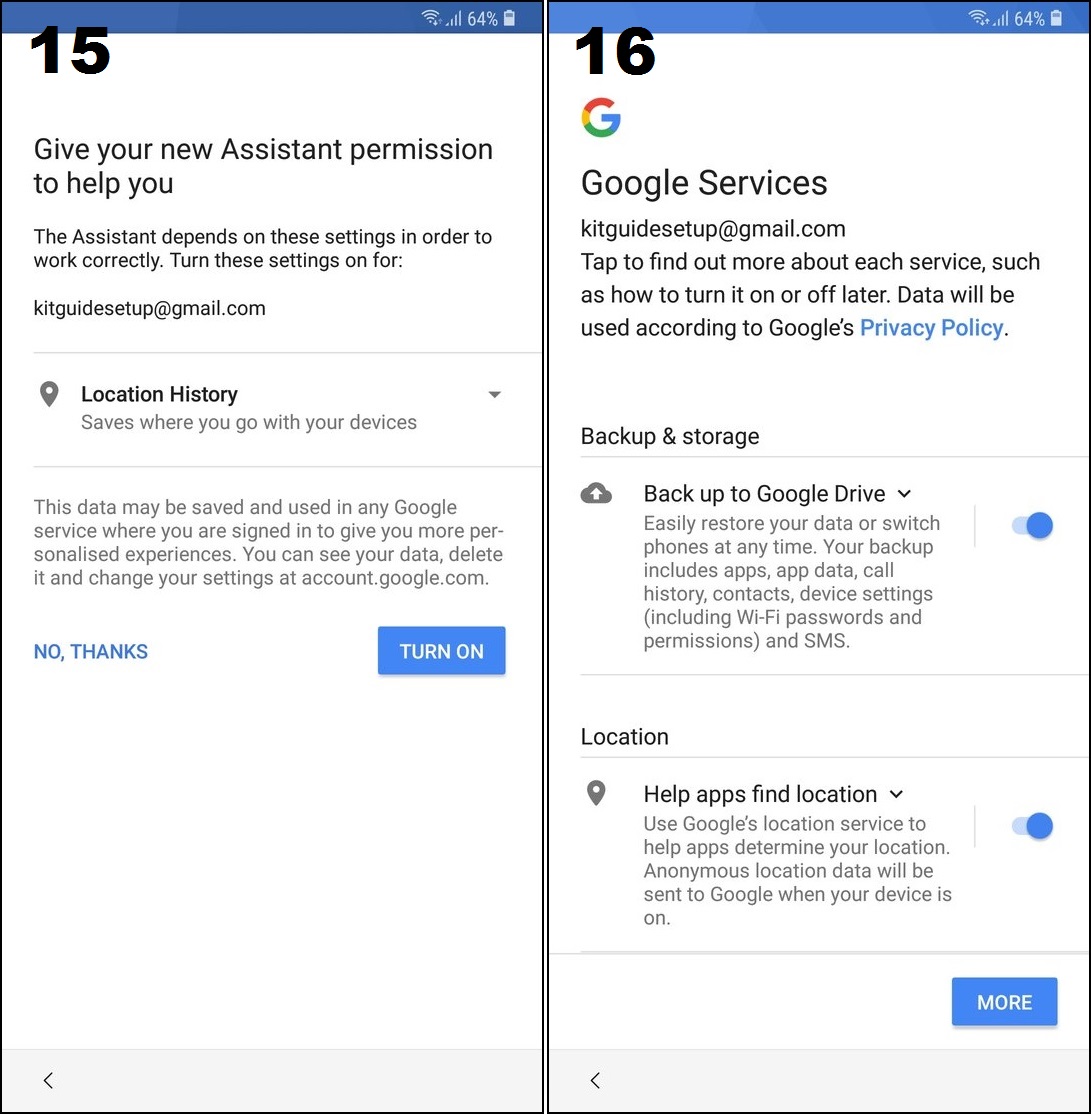
- Location services help to make searches relevant, and power things like mapping. Sending system data back to Google helps make Android better for everyone. When you’re ready, tap I Agree.
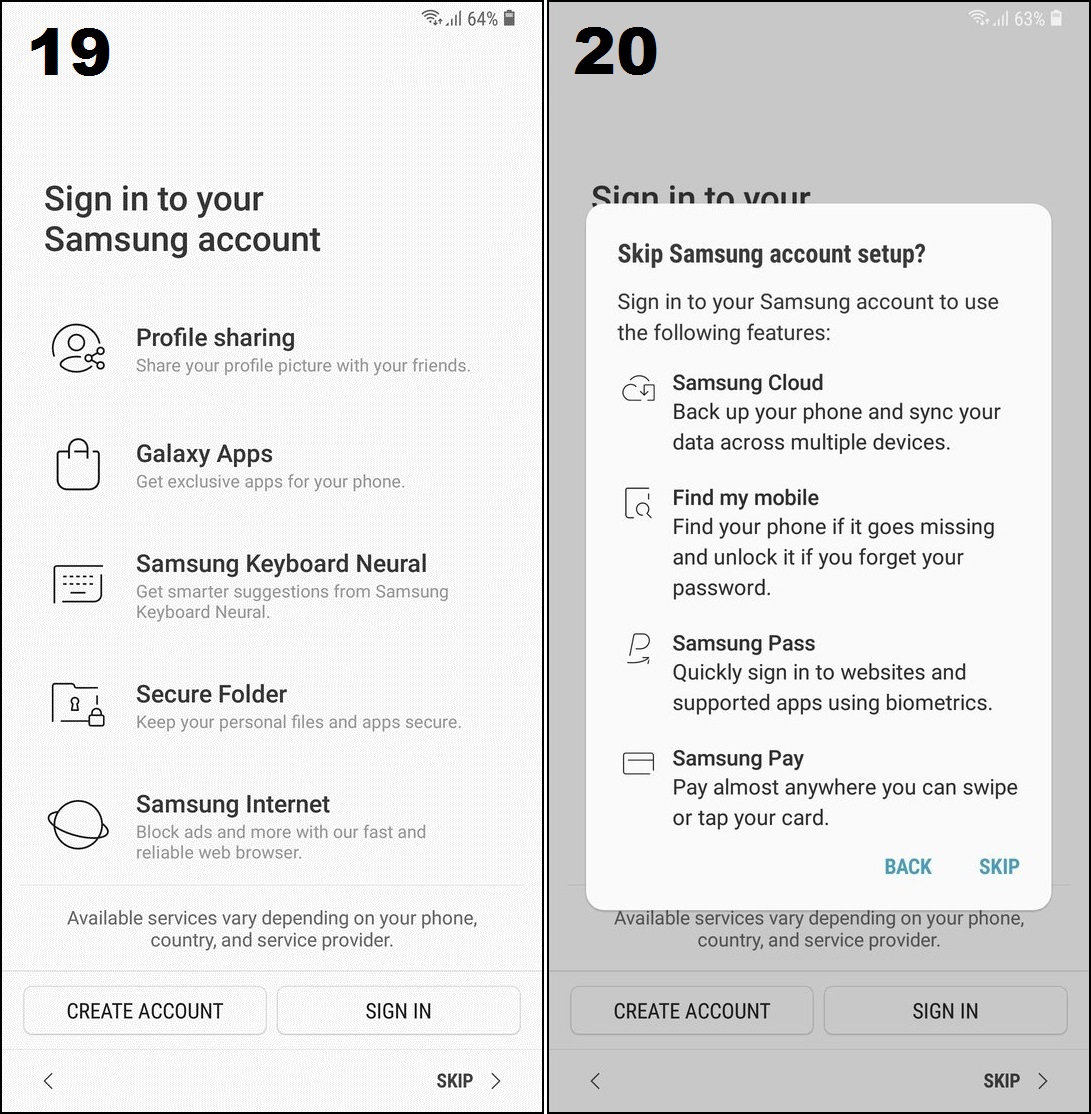
- A Samsung account gives you exclusive apps, offers and other services. Tap Sign in if you’ve used one before, Create account to get a new one for free or Skip to move on.
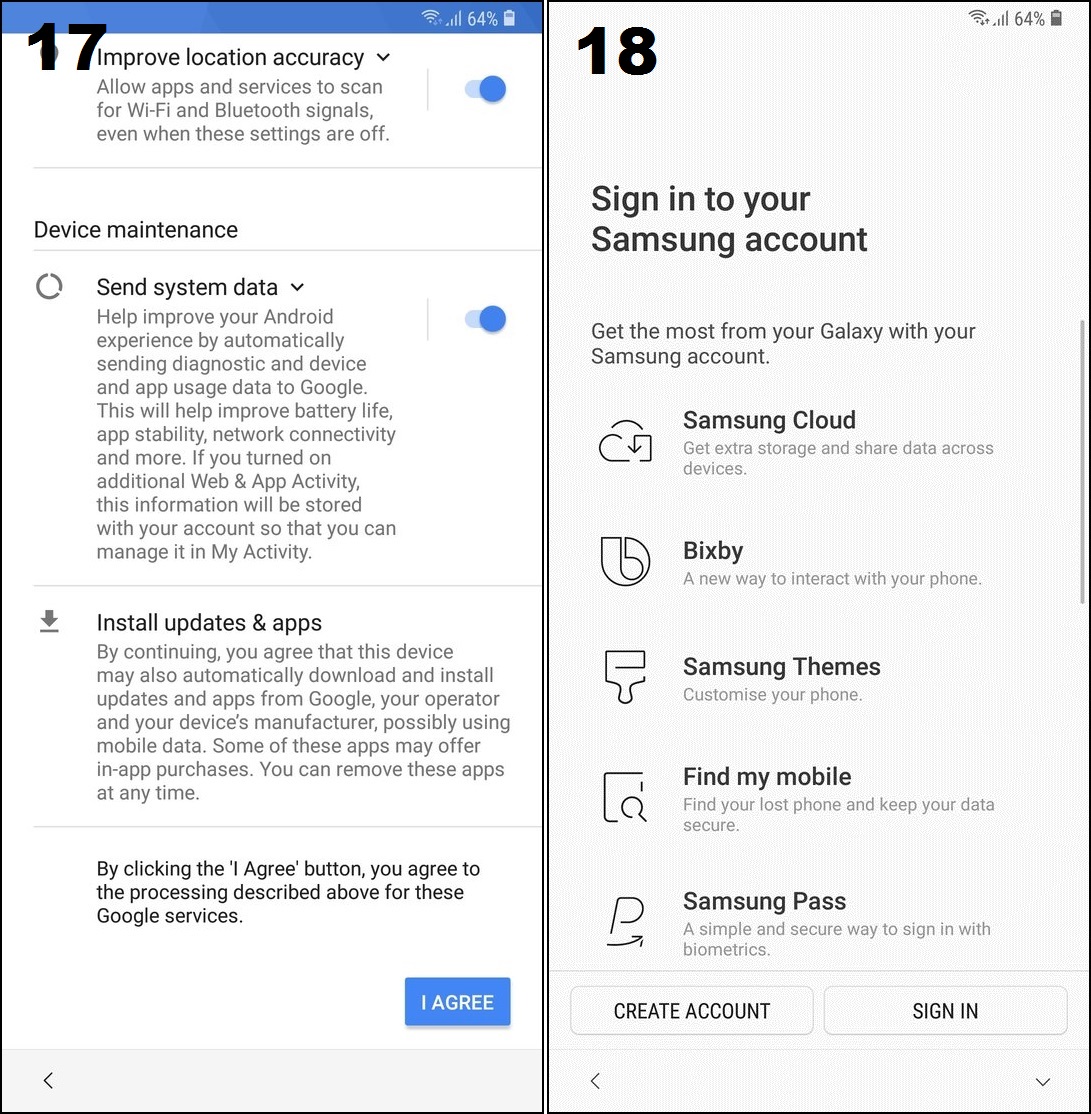
- There are numerous services to take advantage of.
- If you don’t want to add a Samsung account, tap Skip again to confirm.
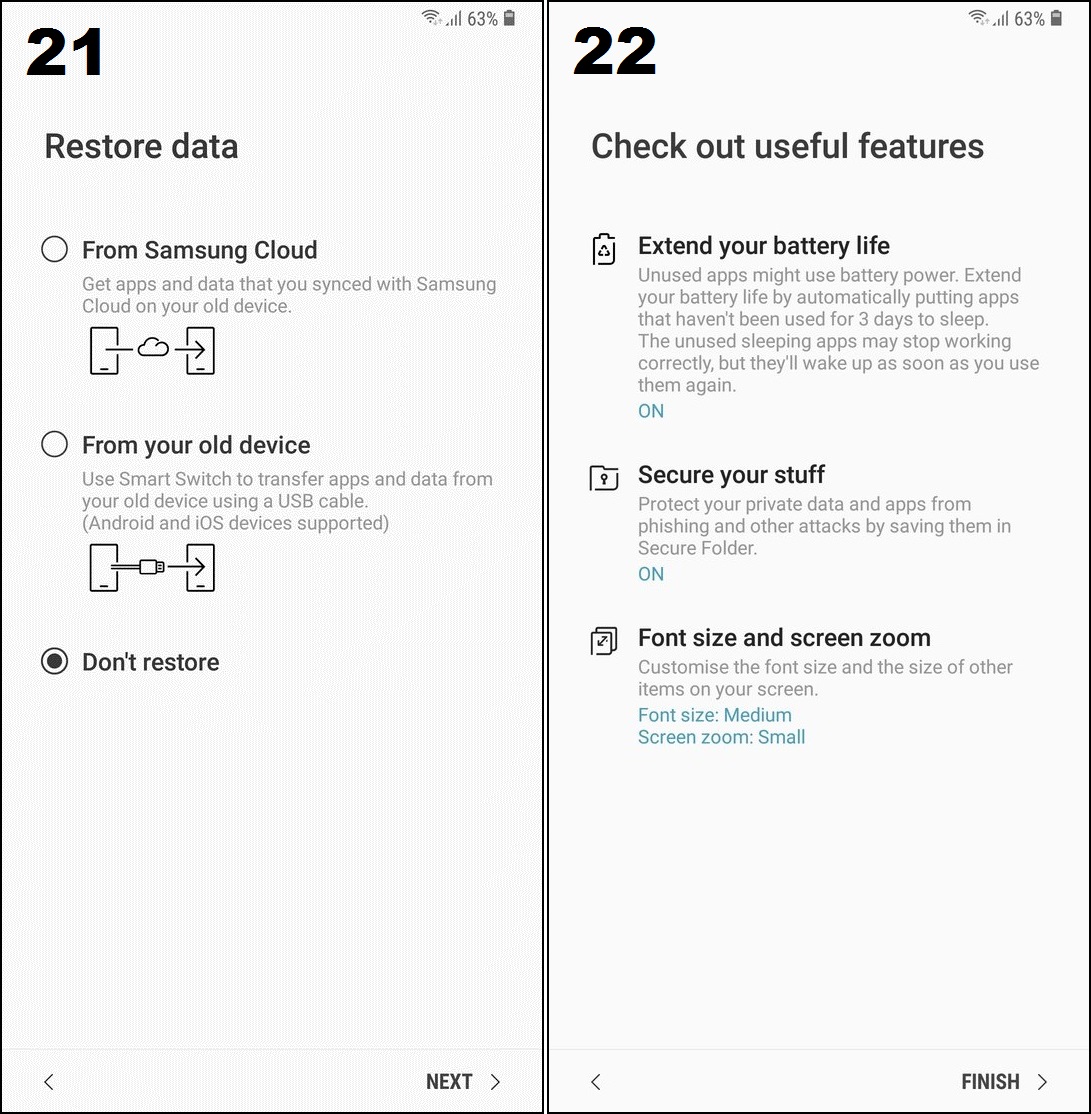
- You can restore data from a Samsung Cloud backup of an older phone, or transfer stuff from your old phone with a USB cable. If you don’t want to do either of these, tap Don’t restore to set your Note 9 up as a new phone.
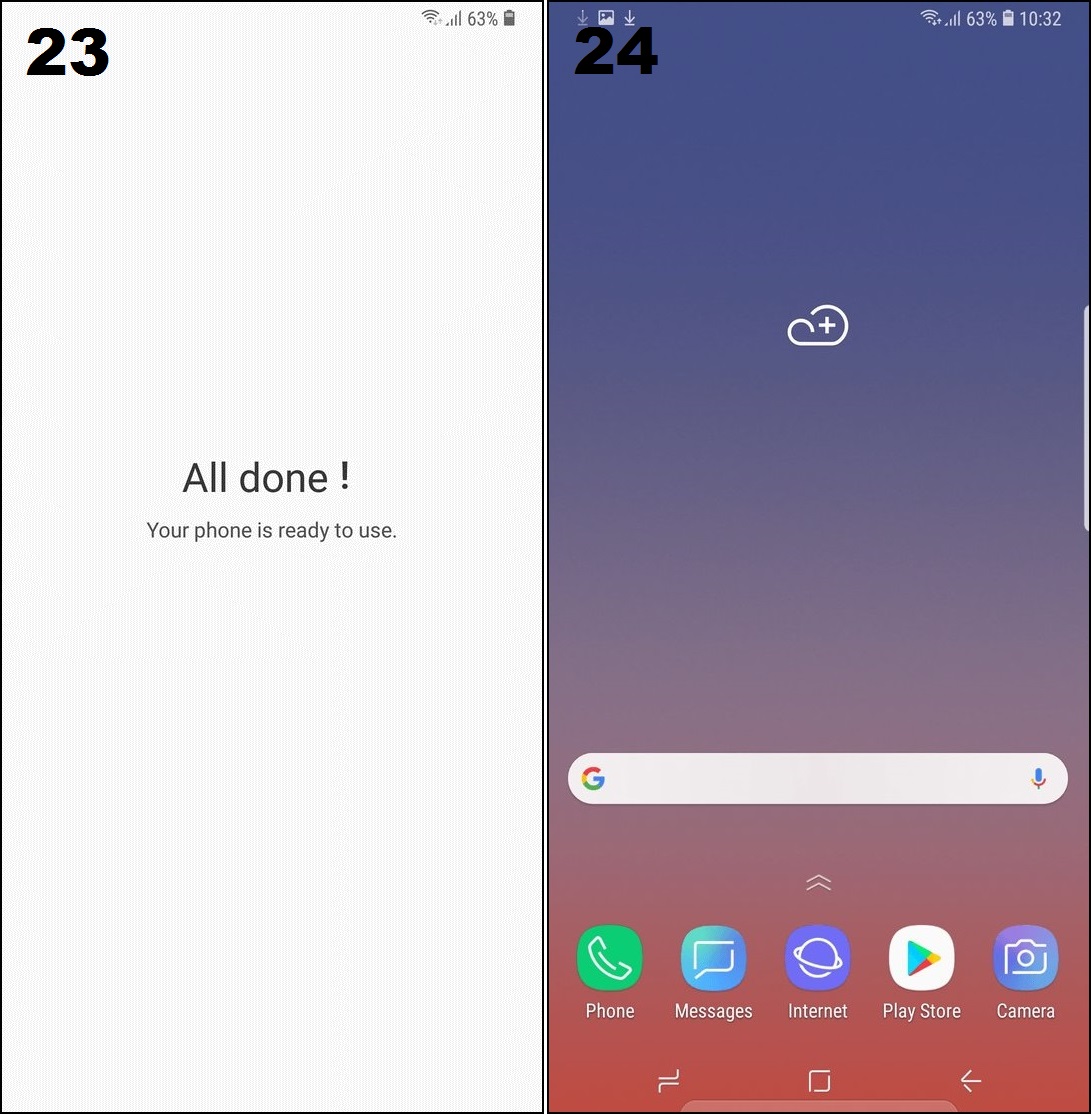
- You’ll see some useful features of your new phone. Tap the down arrow to see them all, changing the options if you want to. Tap Finish.
- That’s your phone set up and ready to use. Press Home (that’s the square on the navigation bar at the bottom of the screen).
- You’ll now be looking at the Home screen of your new Galaxy Note 9. Swipe down on the screen to see the apps installed on your phone, or swipe down from the top edge to see notifications and quick settings.
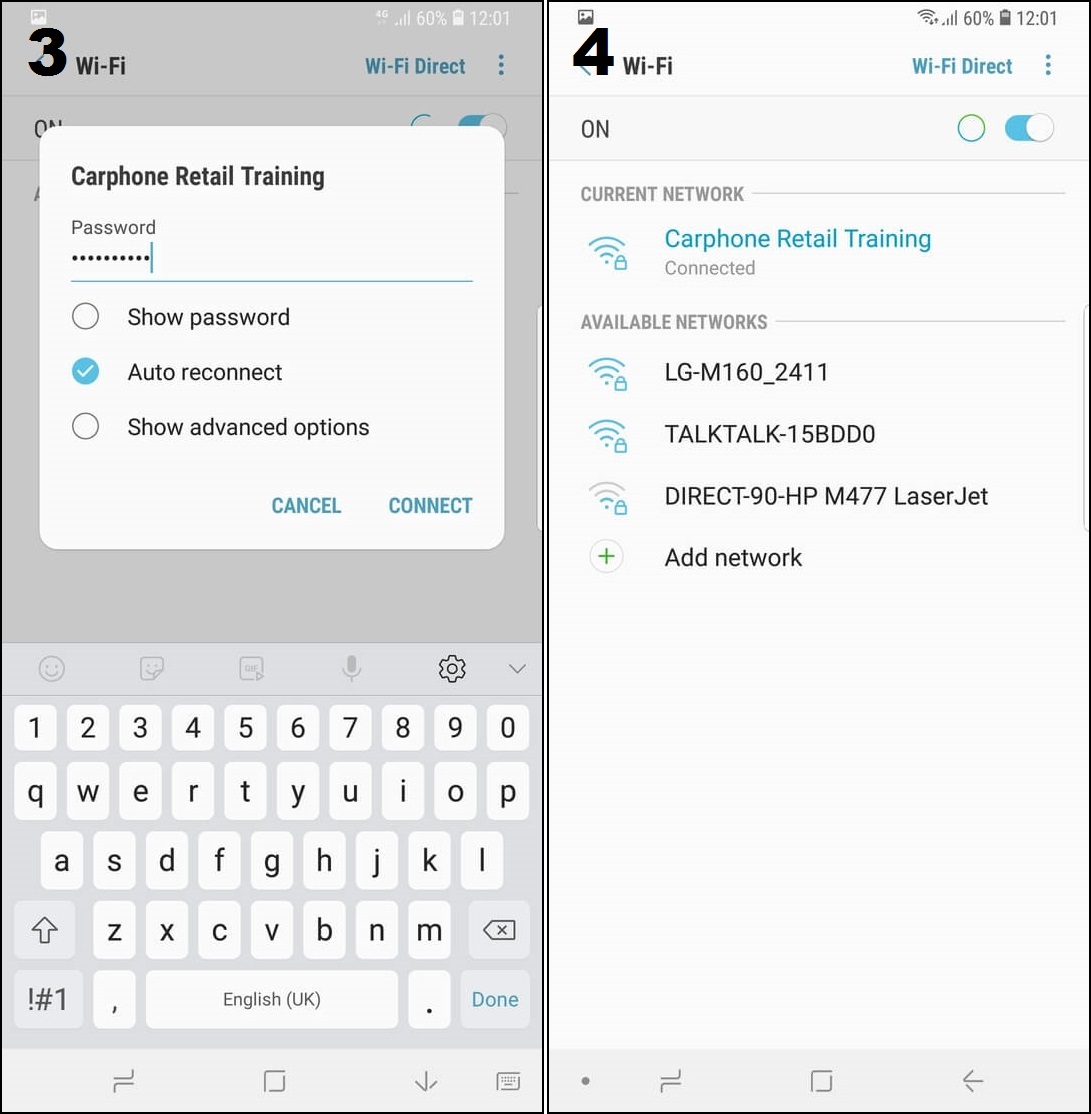
Connecting to Wi-Fi
Many apps, especially things like social media, need access to the internet. These steps will help you get connected.
- Swipe down then tap Settings > Connections > Wi-Fi.
- Find and tap on your network name.
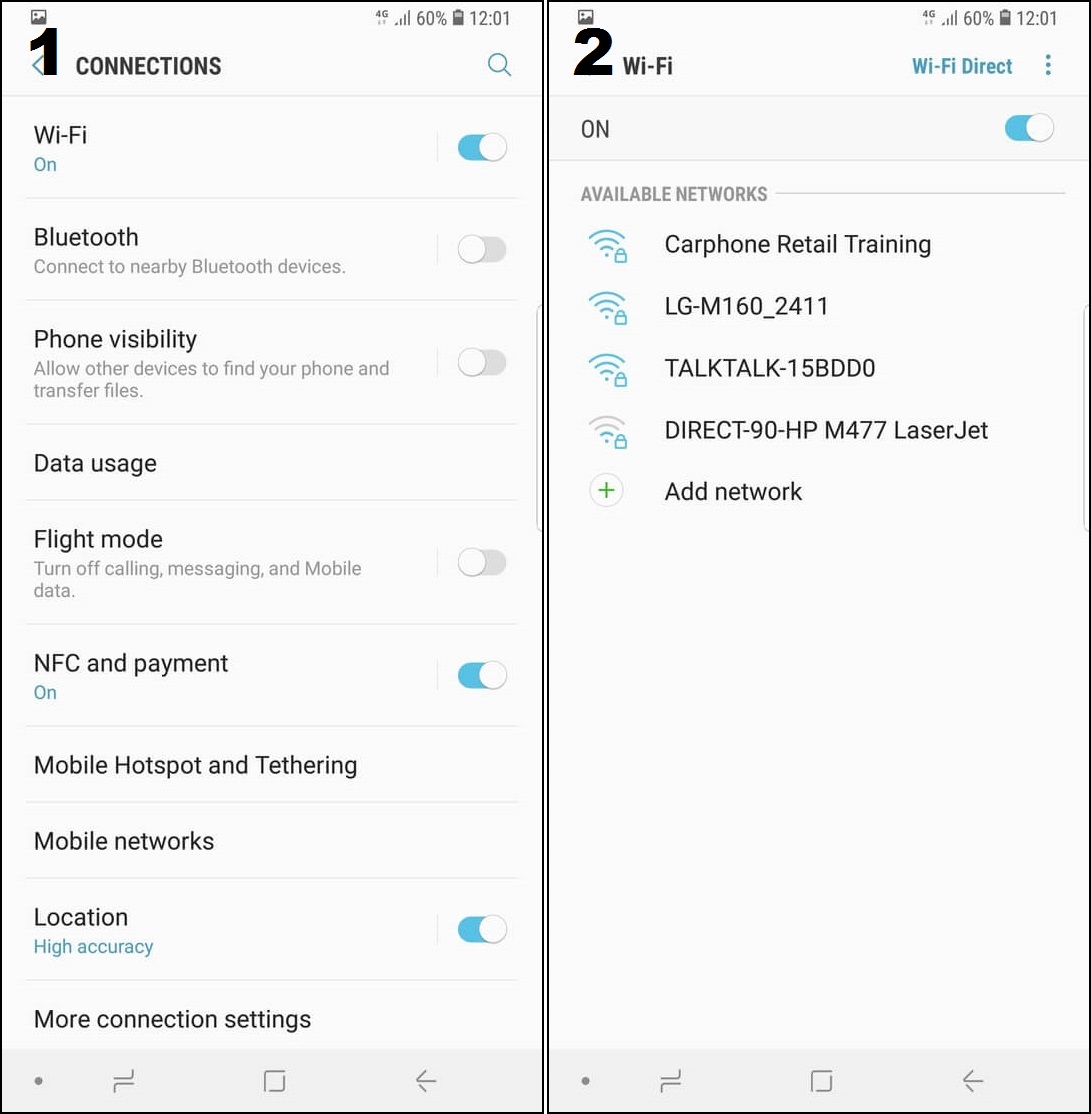
- Type the wireless password and tap Connect. If you’re not sure what it is, check the sticker on the router.
- When it works, you’ll see the network name in blue with ‘Connected’ below it.
Adding your email accounts
Link all your email accounts to your new phone to keep up-to-date while you’re on the move.
- Swipe down on the Home screen then tap Settings > Cloud and accounts.
- Tap Accounts.
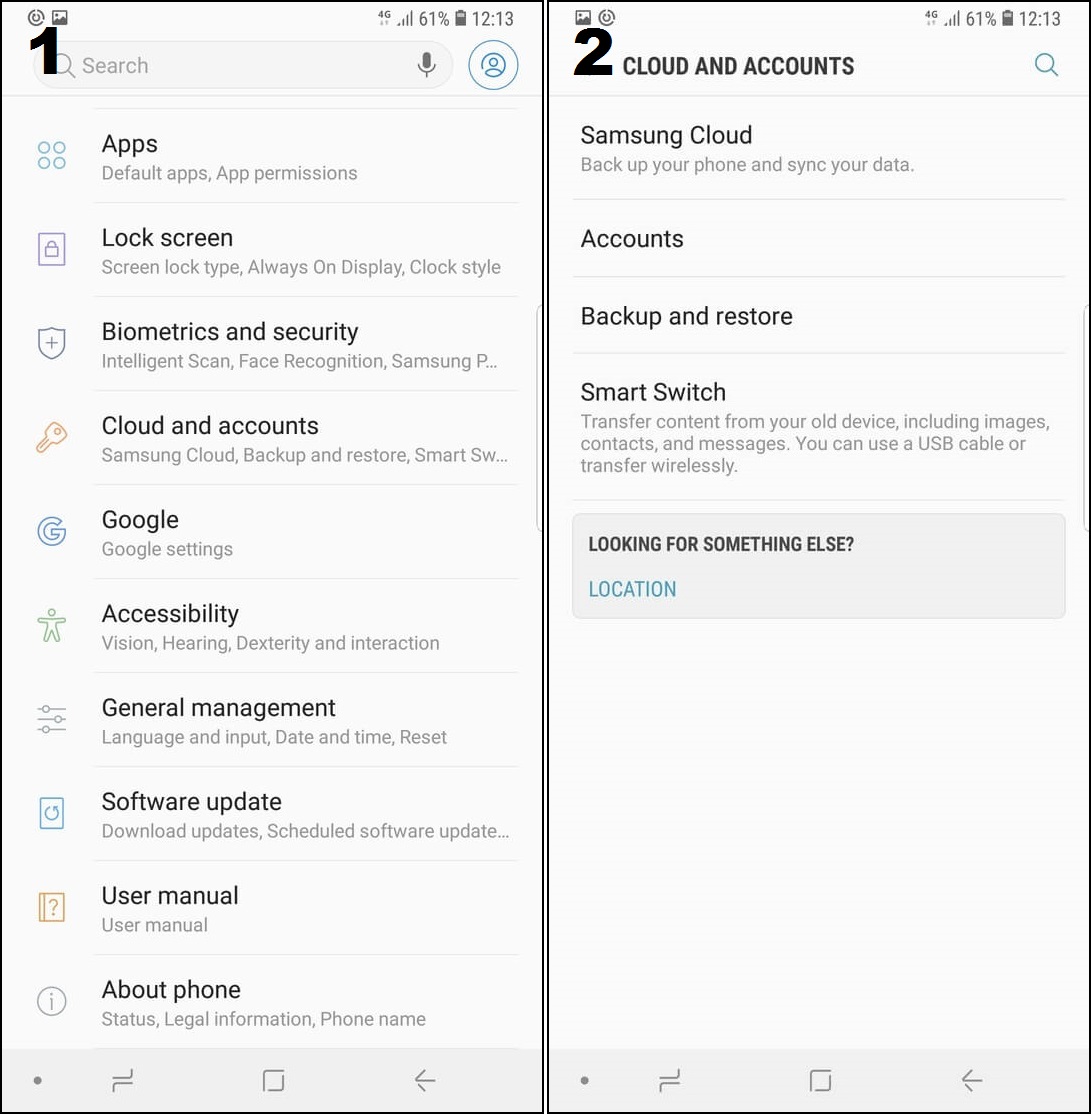
- You’ll see any accounts already on the Note 9. Tap Add account.
- Choose Email if you want to manage your account in the Email app, or one of the Personal options to have your mail arrive in the Gmail app.
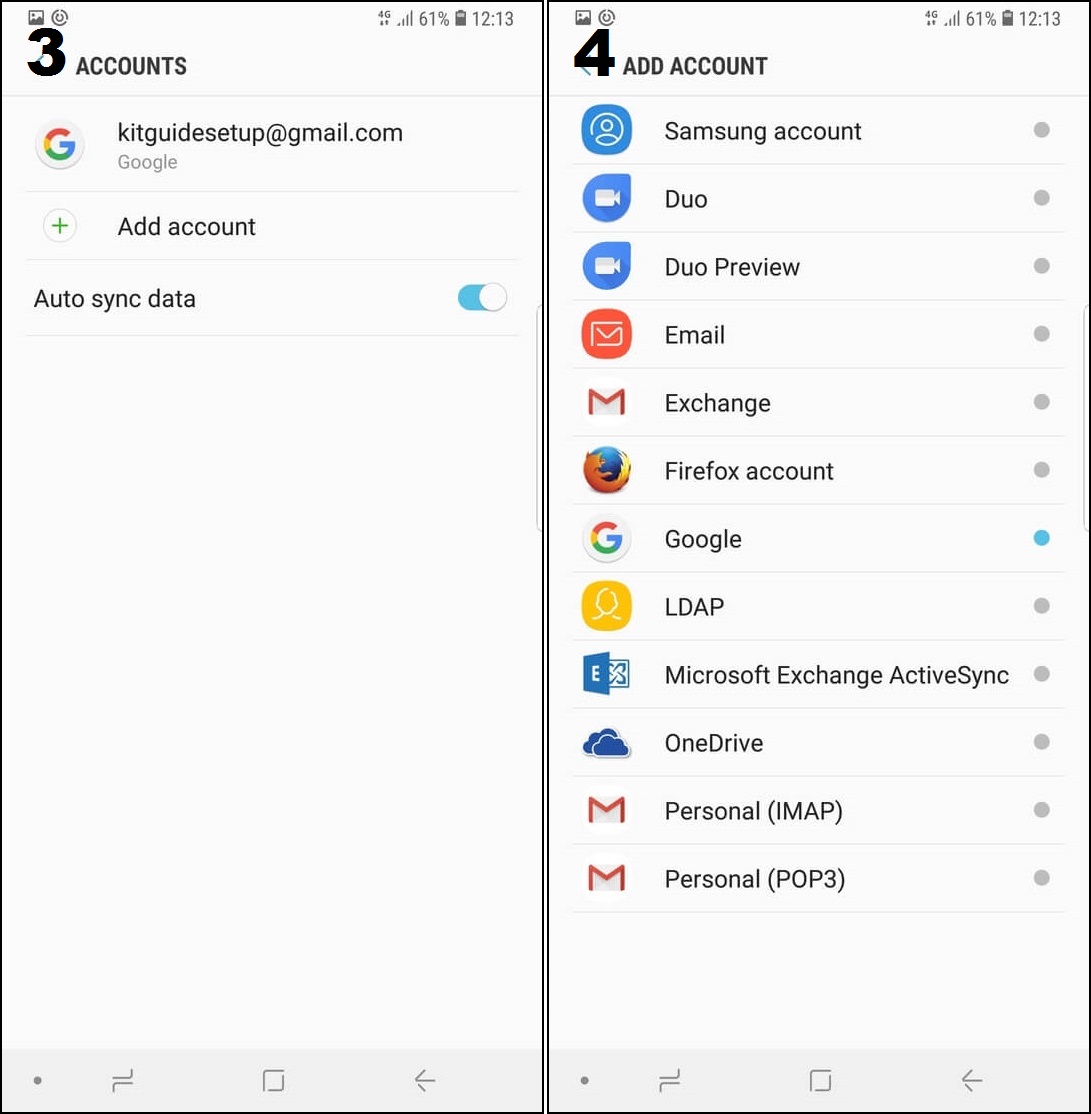
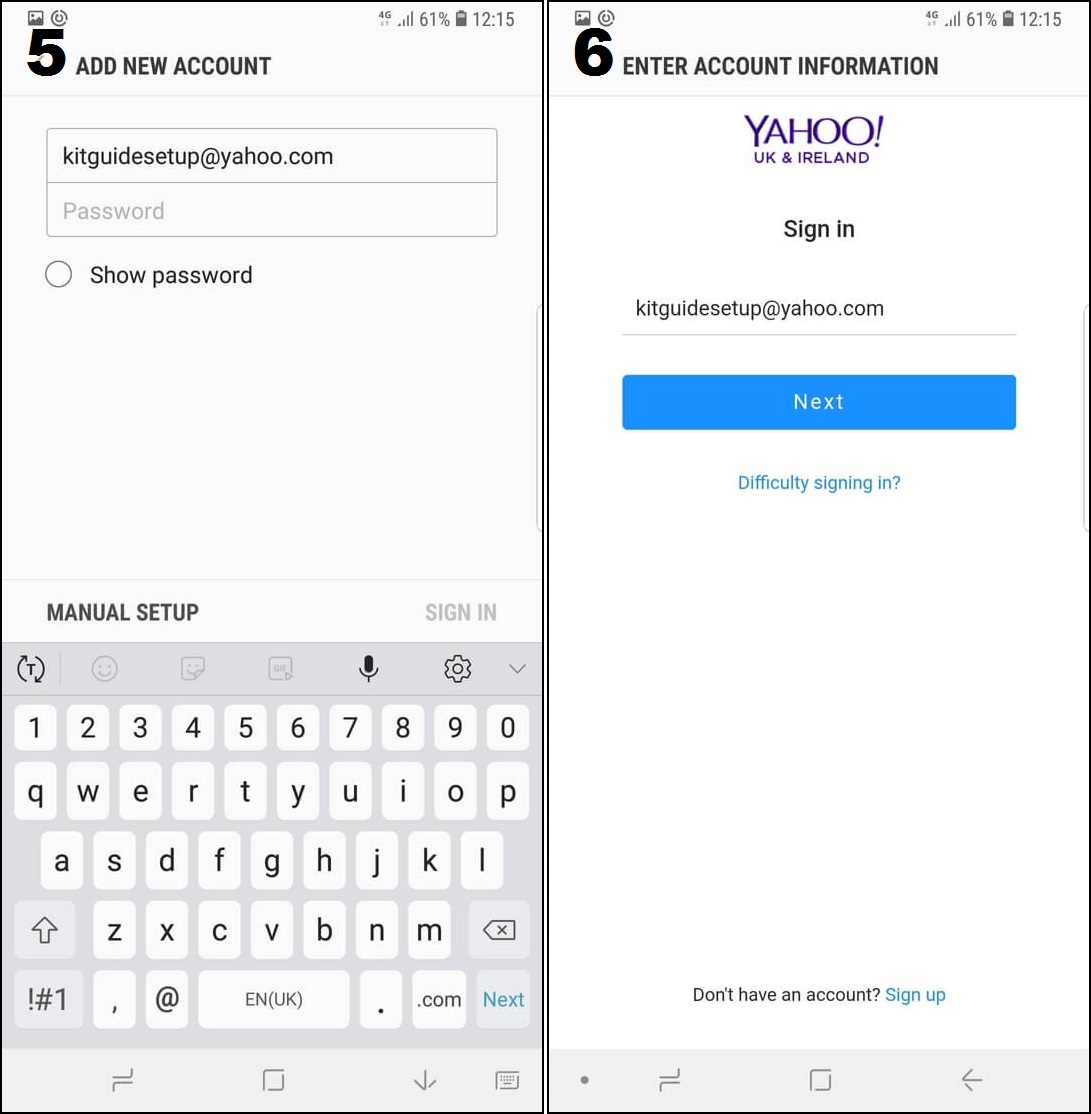
- Type your email address and password in the boxes and tap Sign in.
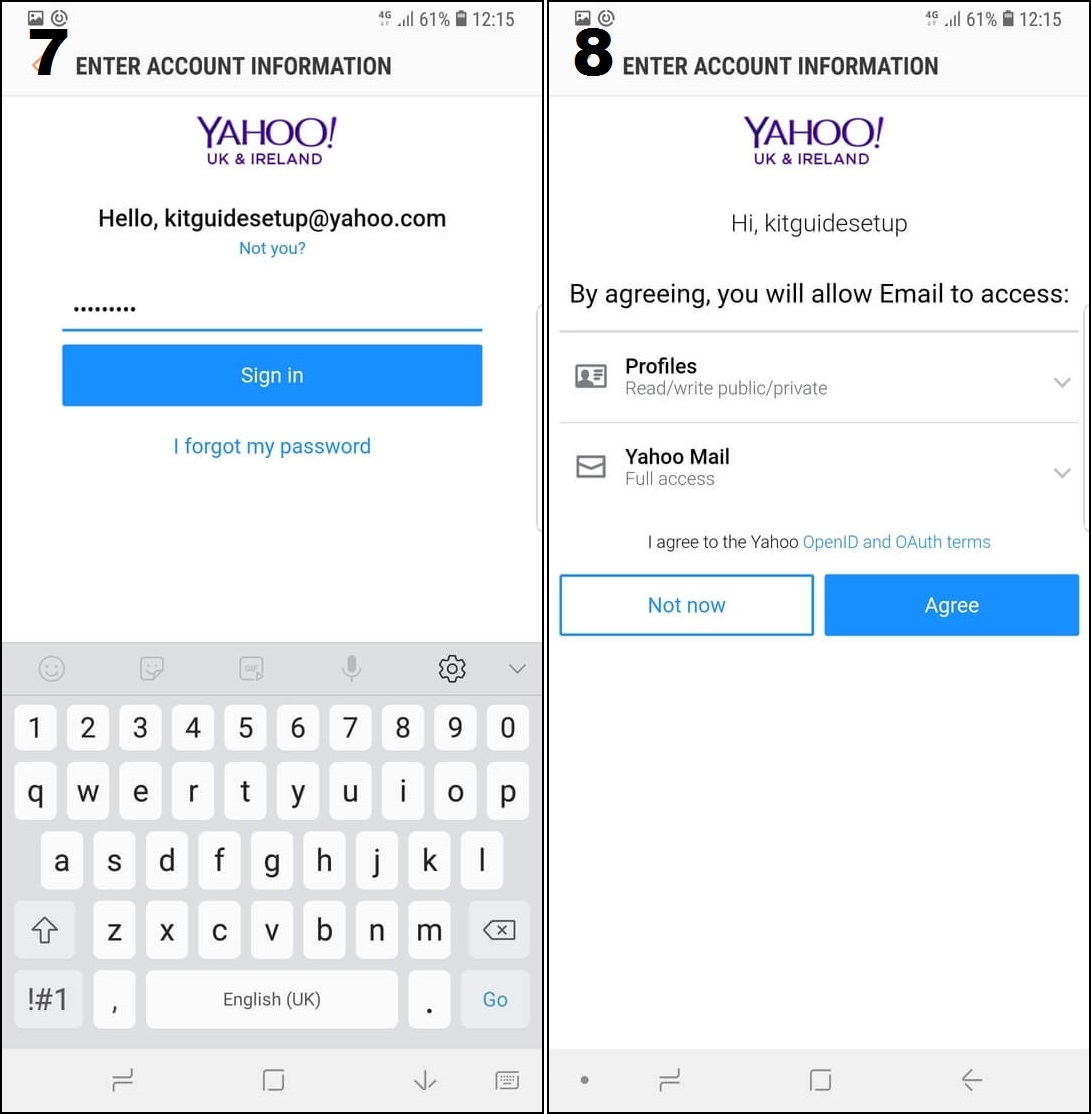
- Some email accounts will open the provider’s account sign-in screens. If you see these, follow the instructions.
- You might be asked to give the account permission to ‘talk’ to other parts of your phone.
- Tap Agree to make the account work properly.
If your account didn’t set up automatically, you might have to put the settings in yourself. Tap Manual Setup and complete the form, our guide to email server settings might help you. Now let’s send an email.
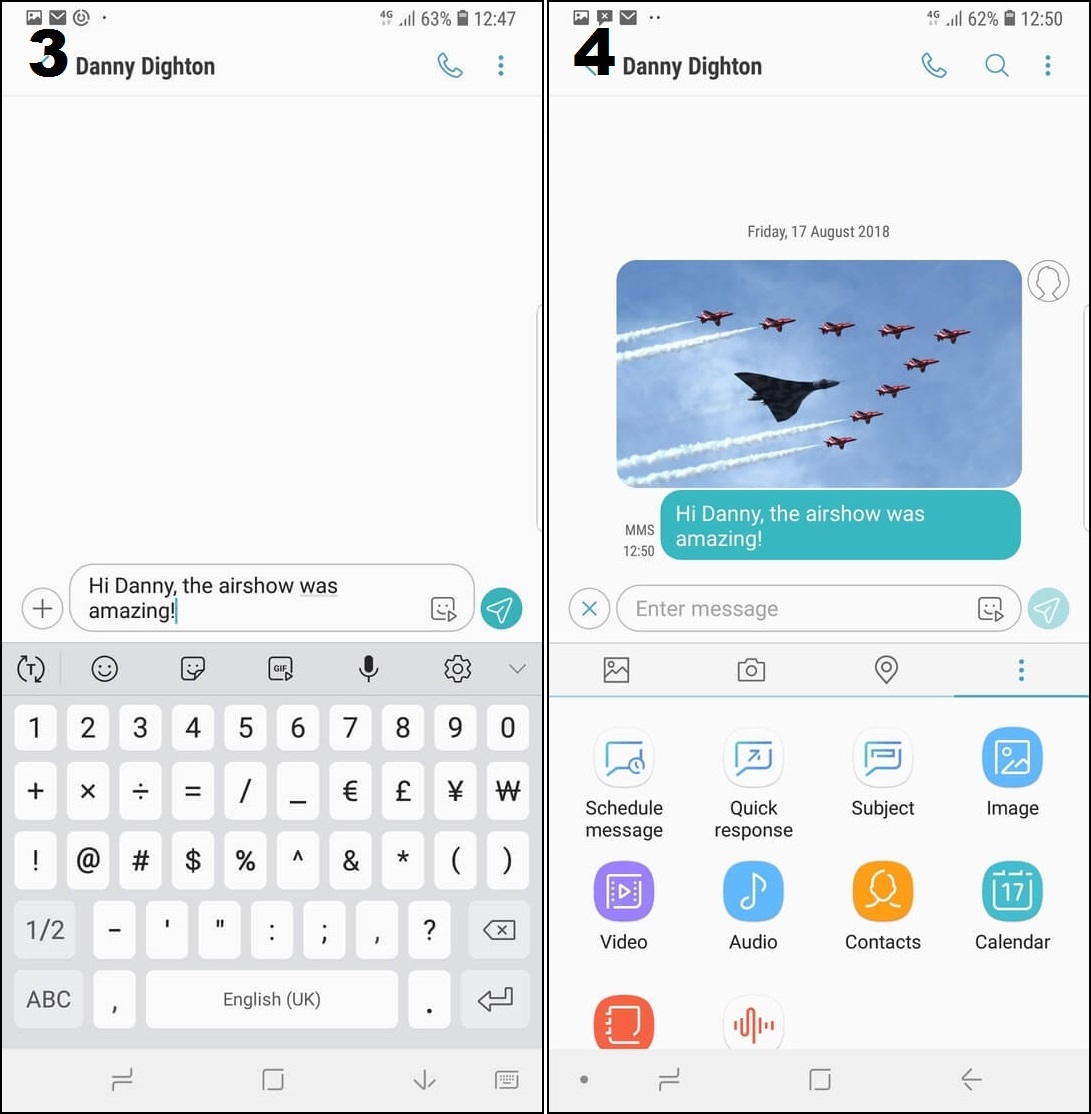
Sending emails
This example shows the Note9’s Email app – but sending from the Gmail app is very similar.
- Tap the icon to open your Email app. To reply to an item in your inbox, tap it. To send a new email, tap Compose at the bottom (it’s orange with a pen & paper symbol).
- Type a name to send the mail to. Contact suggestions show as you type, tap one to pick them.
- Add a subject line and type your message in the main window.
- When you’ve finished, tap Send at the top.
- To add something like a picture or video to your email, tap Attach at the top.
- Use the tabs at the bottom to choose what to attach:
Document - Pick files from your phone or Google Drive.
Gallery - Choose from your pictures and videos
Other - Add things like calendar items, voice messages, notes and location details your email. - When looking for items to attach, select as many as you like then tap Done to add them.
- When you’ve added everything, tap Send.
Sending text messages
Texting is an essential part of everyday life – so you’ll want to get to grips with it right away.
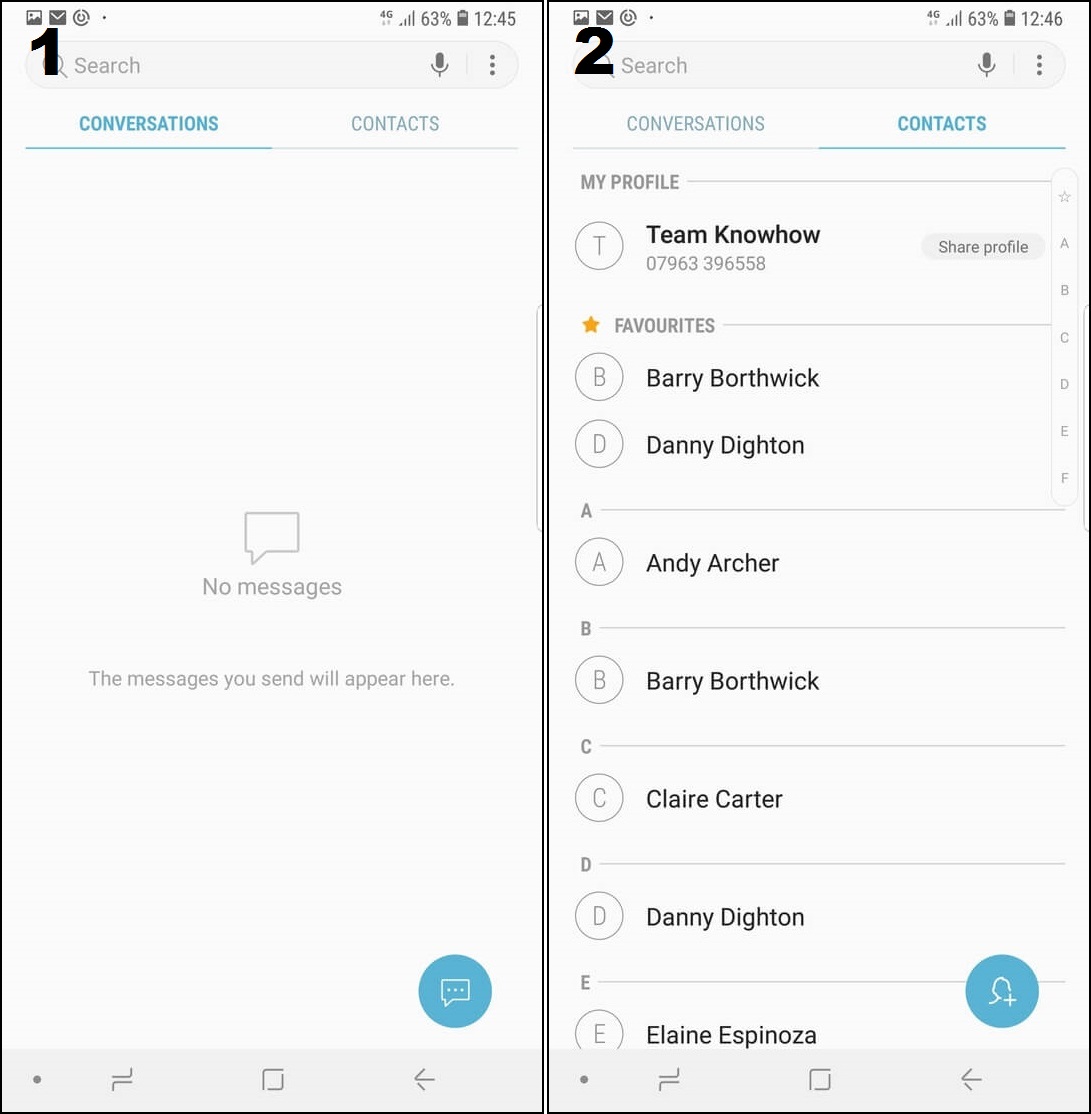
- When you open the app, you’ll see a list of conversations. Tap one to answer with a text, or tap the New message icon at the bottom (it has a speech bubble on it).
- Tap Contacts to pick someone to message.
- Type out your message and tap the blue Send icon (with the arrow on it).
- To add something to your message, tap an icon above the number buttons. You can add GIFs, pictures and even sound clips to make them that bit more interesting.
Sending WhatsApp messages
WhatsApp uses the internet to send messages, so if you haven’t got a large text allowance, you can use Wi-Fi and still send messages.
- Open WhatsApp and tap a conversation to reply to it. For a new message, tap the green icon in the bottom-right corner.
- Choose the contact you want to send a message to, or add a new contact.
- Write your message in the ‘Type a message’ box. Add any attachments you want (pictures, videos or other files) using the paperclip icon.
- When you’re ready, press the arrow on the right to send it.
Downloading apps
Downloading apps to your Note9 is simple. Follow the steps to install new apps to your phone, and rediscover apps you might have used on previous Android devices.
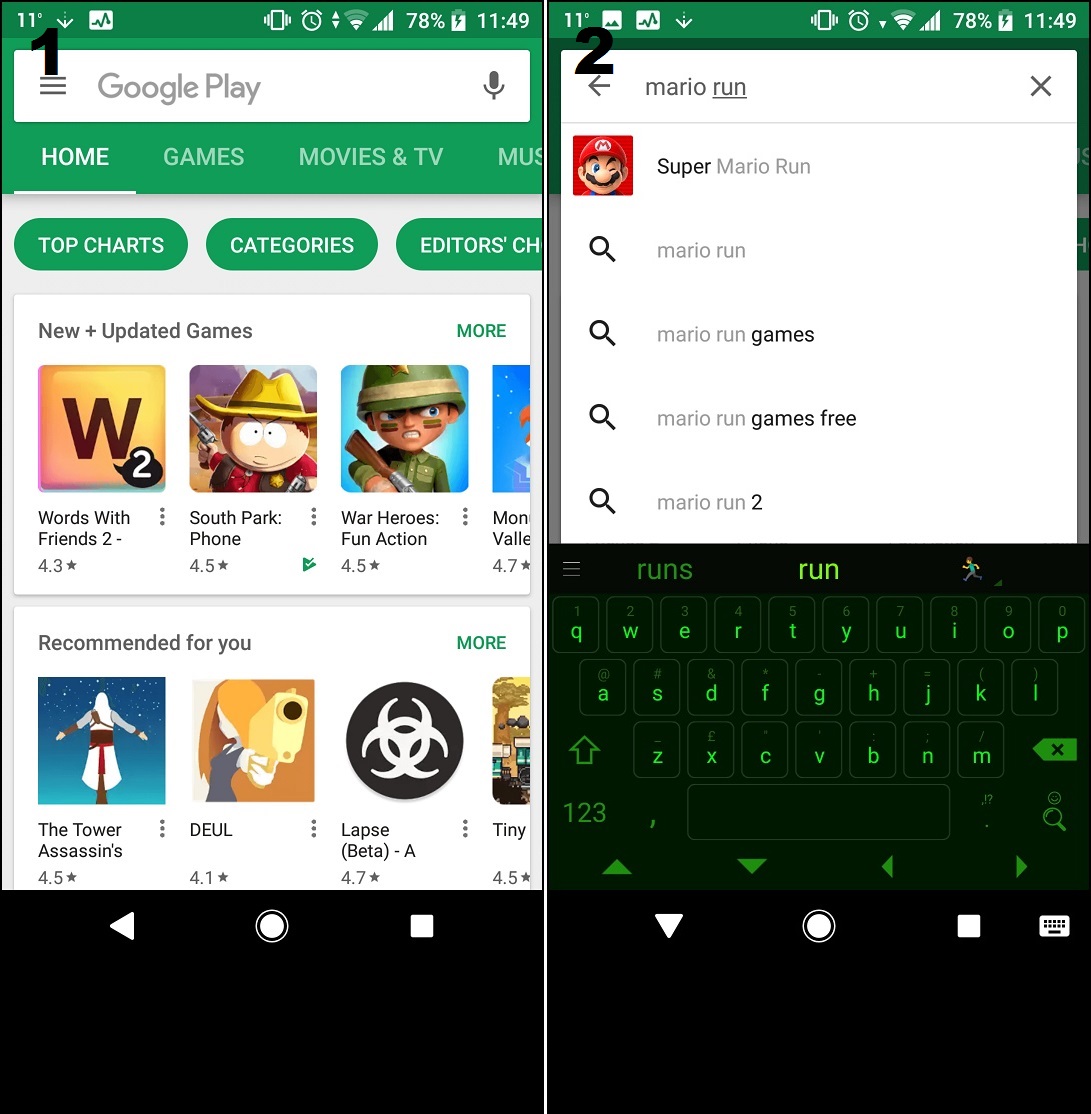
Downloading apps from the Play Store
- Find and touch the Play Store icon from your Home screen. You will see a search box at the top of the store, and app recommendations below it.
- Tap the search box to look for an app. Use the on-screen keyboard to type an app's name, then tap on one of the suggested apps to view all the details.
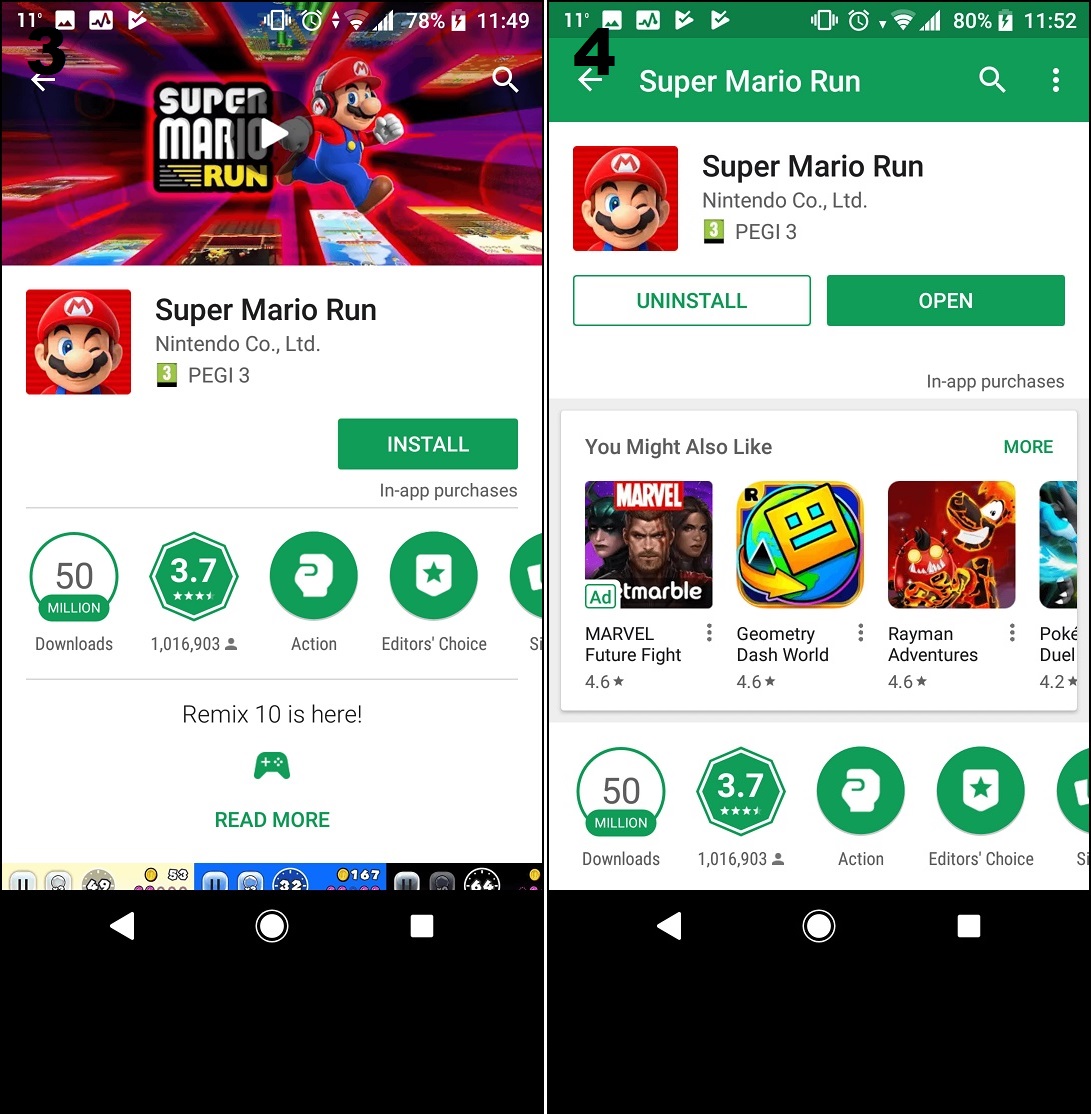
- After you tap on an app, you can see more information about it. That includes the name of the developer, the price of the app, a description and some screenshots of what the app looks like. Press Install to start downloading the app.
- Once the app is downloaded, the 'install' button will change into an 'open' button. Tap Open to launch the app, or browse through your Apps list to find your new app there.
Downloading apps from your old phone
- Open the Play Store app, tap the Menu button in the top-left corner, or swipe your finger from left-to-right across the screen. Press My apps & games to continue.
- There are four tabs at the top of this page, Updates, Installed, Library and Beta. Updates is where you'll find all the apps on your phone that are waiting to download an update.
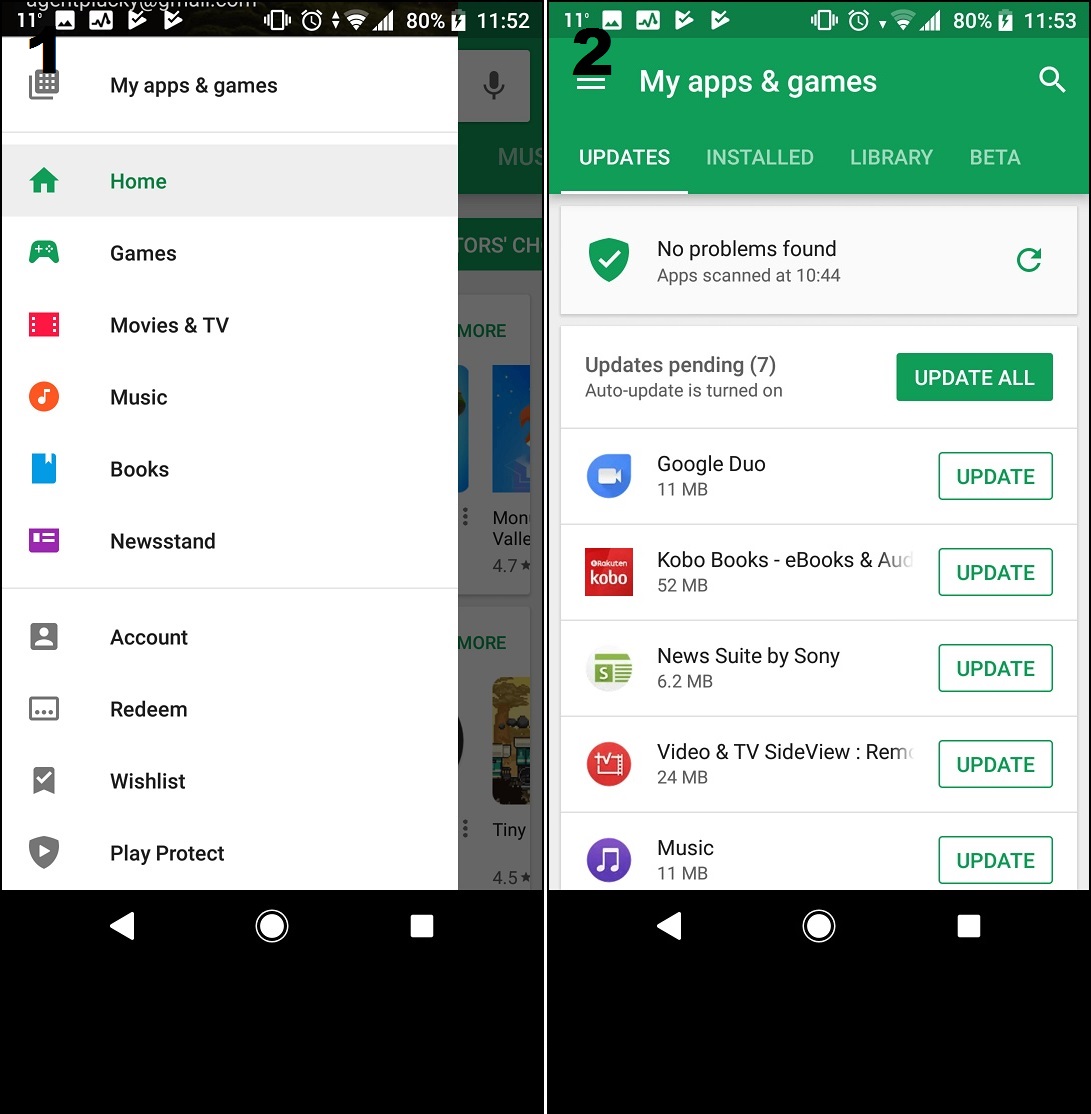
- The Installed tab shows a list of every app currently installed on your device.
- Library shows you every app you've ever downloaded, so you can easily re-install an app you've enjoyed in the past.
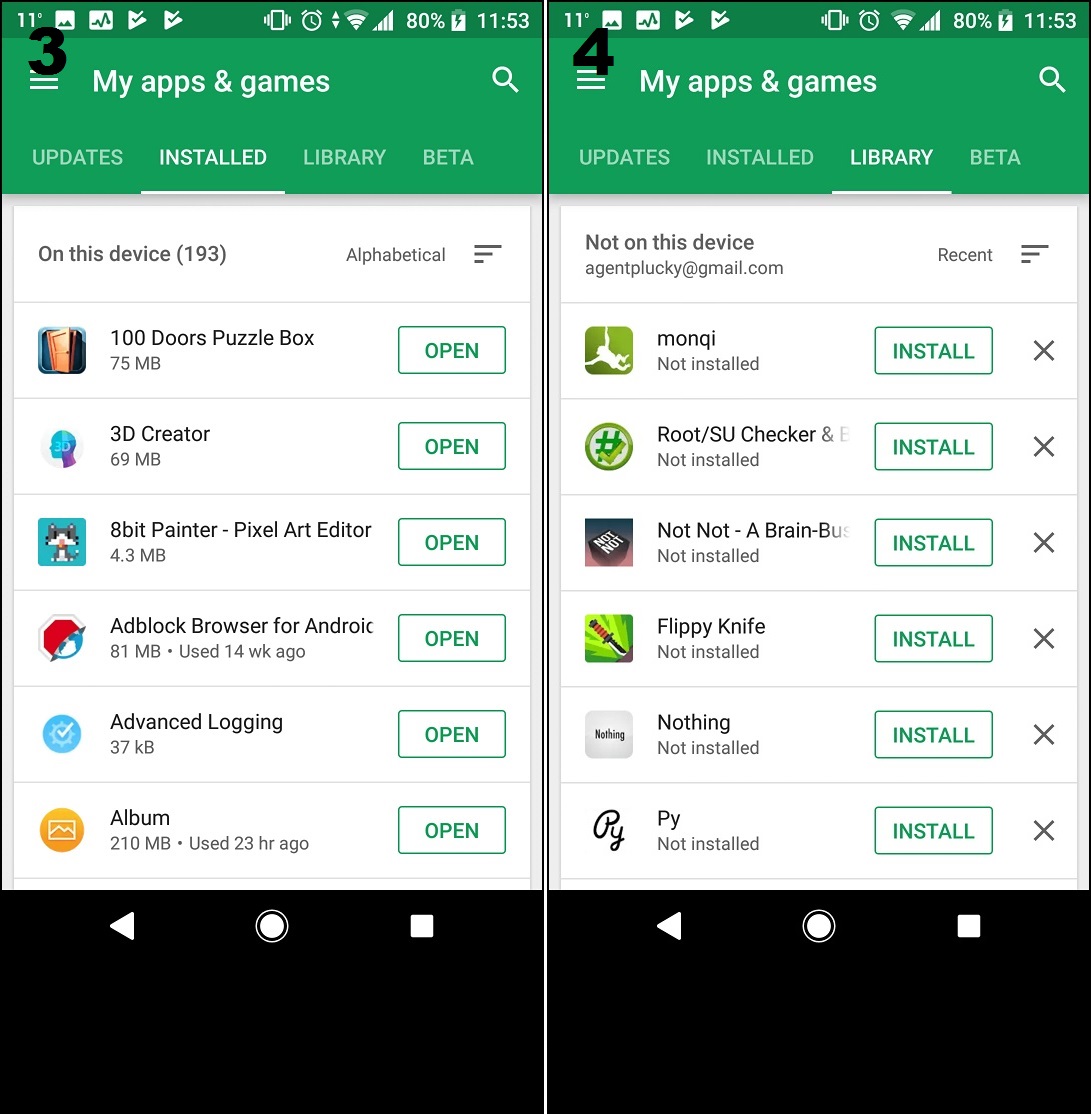
You will now be able to search for new apps as well as easily download your previous apps.
Using Samsung pay
Samsung Pay can use your Note9 to make contactless transactions, so you can still pay for things if you forget your card or wallet. You can use it anywhere that allows contactless payments. Some stores will even let you add your loyalty card, so you’ll never miss out on points again.
You can also set up a ‘transport card’ to use on TfL services. You don’t even need to wake up the Note9 to use it, merely tap the middle of the phone onto the card reader. TfL services include: London buses, the Tube, London Trams, DLR, London Overground, TfL Rail, Emirates Air Line, River Bus and most National Rail services in London.
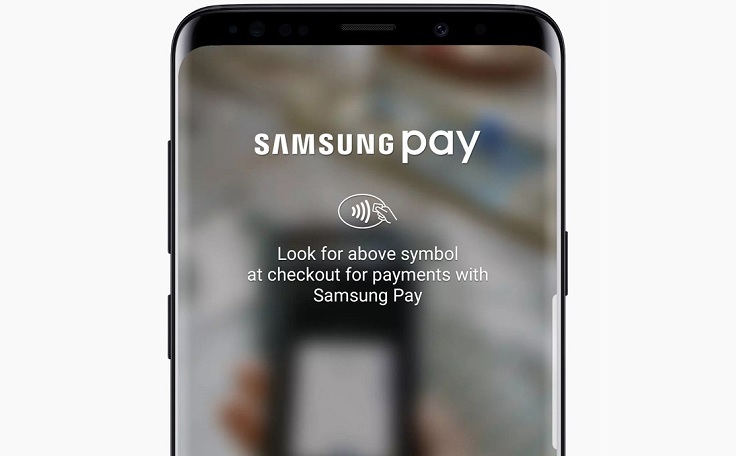
How to set it up...
- Open the Samsung Pay app from the Home screen.
- Sign in using your Samsung account, or follow the instructions on the screen to get one. If there’s an account already registered to the phone, make sure to sign in using that one.
- Choose whether to use the Iris scanner, fingerprint or a PIN code to verify your payments.
- Add your debit/credit cards by pressing the + icon. A message will pop up asking you to let the camera access the app. Choose Enable.
- Position your card so that it’s inside the ‘frame’ on the screen, then your Note9 will scan it.
- Fill in any missing details once the scan is done.
- Agree to the Terms of Service, then verify the card when asked.
That’s it, now you’re ready to shop.
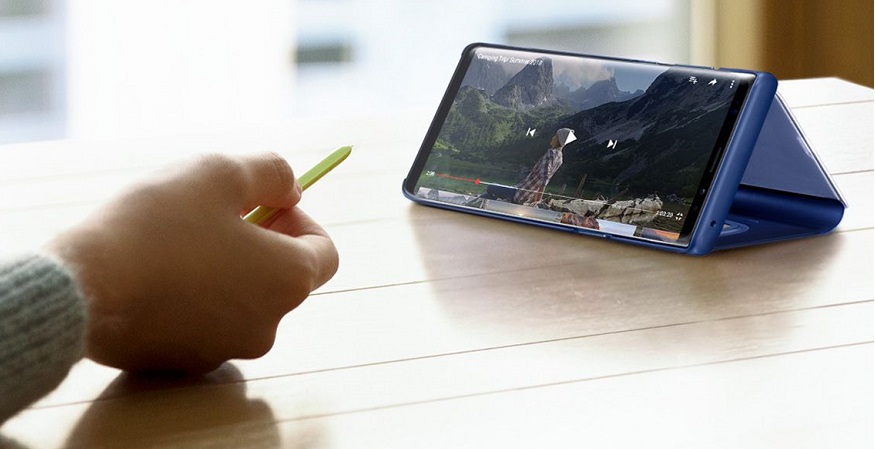
Using the S Pen
The slinky new S Pen in the Note9 uses Bluetooth to transform the way you use it. The battery will last up to 40 minutes, but charges back to full power after just 25-40 seconds of being holstered.
Here’s just some of what you can do with it:
• Control the camera – instead of rushing to beat the self-timer or straining your arm trying to get the perfect selfie, you can use the S Pen as a remote for the camera.
• Control presentations – you can cast a presentation from your Note9 and use the S Pen to switch between slides. Very slick.
• Using apps – some native and third party apps support S Pen control. YouTube, for example, lets you use the S Pen to play, pause or switch to the next video.
• Screen off note pad – when the Note9’s screen is off, popping out the S Pen turns the phone into an intelligent notepad. If you need to make a quite note of something or start a to-do list, the Note9 is always ready.
• Live messages – you can add uniquely personal touches to your messages by doodling on your emoji’s or just by sending a heart-felt hand written note.
Multitasking on the Note9
Samsung are still offering multitasking on the Note9, but it’s a little bit hidden at first. You need to go to Settings > Advanced features > Multi Window and turn it on. After that you can use the split screen icon (two rectangles on top of each other) from the ‘Recent apps’ list to use two apps at once.
As well as splitting the screen, you’re able to choose a specific part of the screen to dock at the top, or use the pop-up view to turn it into a small window that you can move anywhere on the screen. Marvellous if you hate switching between your favourite apps.
Backing up content
We all want to keep what’s on our phone private– so here’s how to keep it locked up tight.
Back up your personal information:
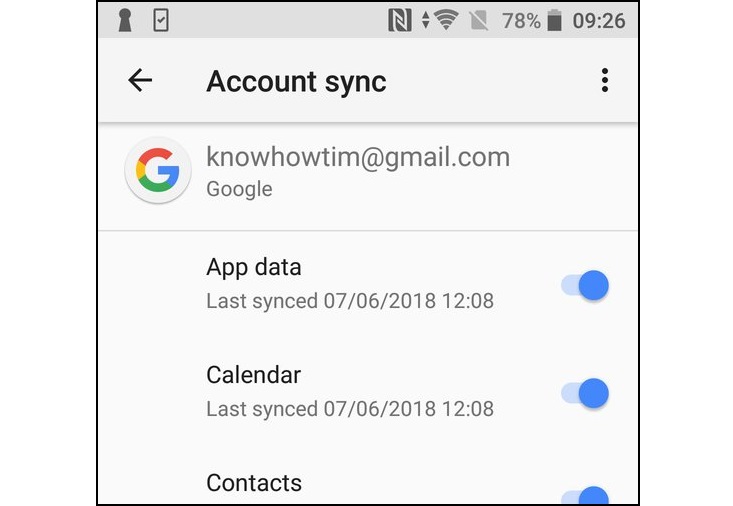
Things like contacts, calendar appointments and fitness data sync marvellously with your Google account across all of your Android kit in real-time.
Add a contact on your Android phone, and it’ll show on your tablet too thanks to the Google account.
Go to Settings > Accounts > Google to check what’s syncing. Tap the switches to make any changes but remember that deleting something from one device deletes it from all of them.
Back up the phone's apps and settings:
To back up your phone’s settings:
- Go to Settings > Backup & reset > Back up my data to turn the service on.
- Tap Backup account and pick your Google account, or tap Add account to use a different one.
- Depending on your phone, there might be other options to control what to back up, where to save it etc.
Once it’s set up, you don’t need to do anything else at all. Changes you make to things like contacts, Wi-Fi passwords, apps and settings are all saved online, ready for when you need them.
Backing up your photos:
Google Photos is an app that comes as standard on Android devices these days, and lets you back up (and share) your photos and videos. If it’s not on your phone, download it from the Play Store and follow these steps to back up photos:
- Open the Google Photos app on your Android.
- Tap Menu > Settings > Backup & Sync.
- Tap the switch to turn the service on.
You’ll be able to see options to choose things like the file upload size, and which of your folders are backed up. Pick ‘High Quality’ files and you’ll be able to back up as many pictures as you like online – there’s no limit. If you change to ‘Original’, you’ll save the absolute best quality images, but they will take up part of the free storage that comes with your Google account.
Smart View
The Note9 comes pre-loaded with Samsung Smart View. This app allows you to control your smart TV with a phone, simply connect them to the same network.
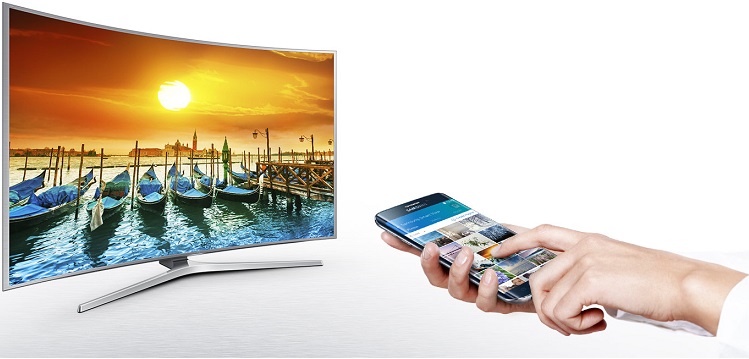
Not only does that give you an extra control, you can also cast things like photos, videos and music, and they’ll play on the TV. Create a playlist in the Smart View app to play your favourites in just a snap of the fingers.